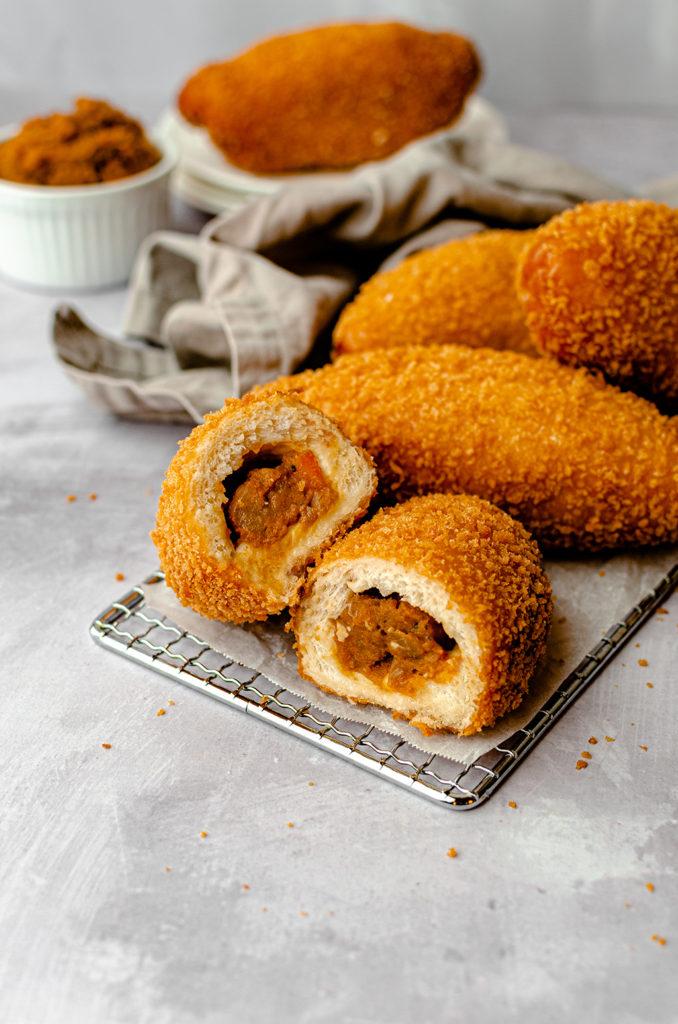
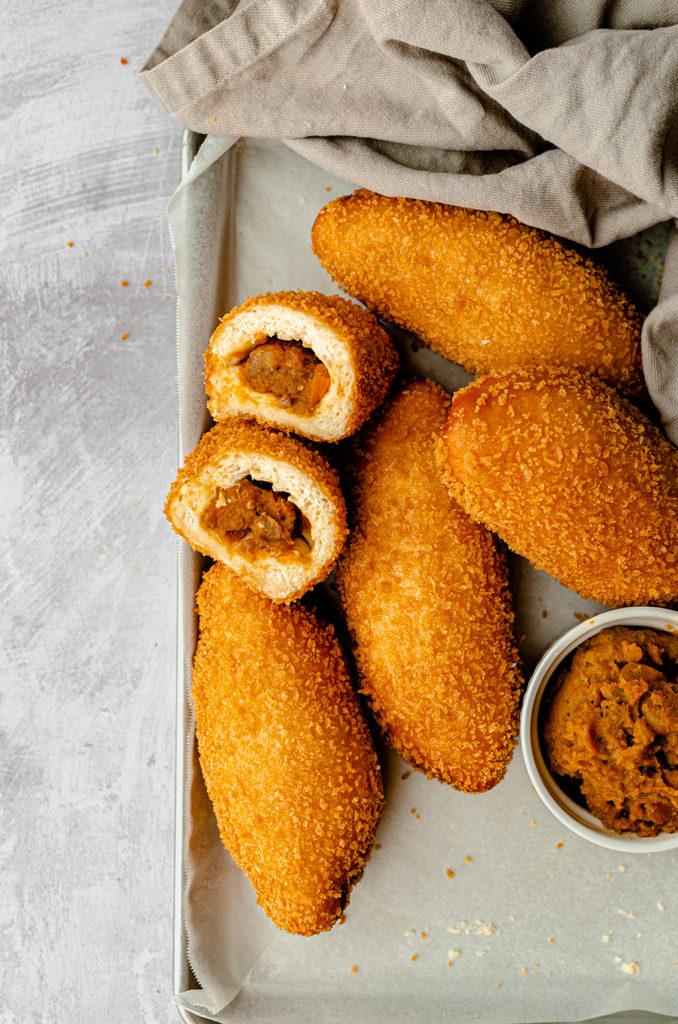
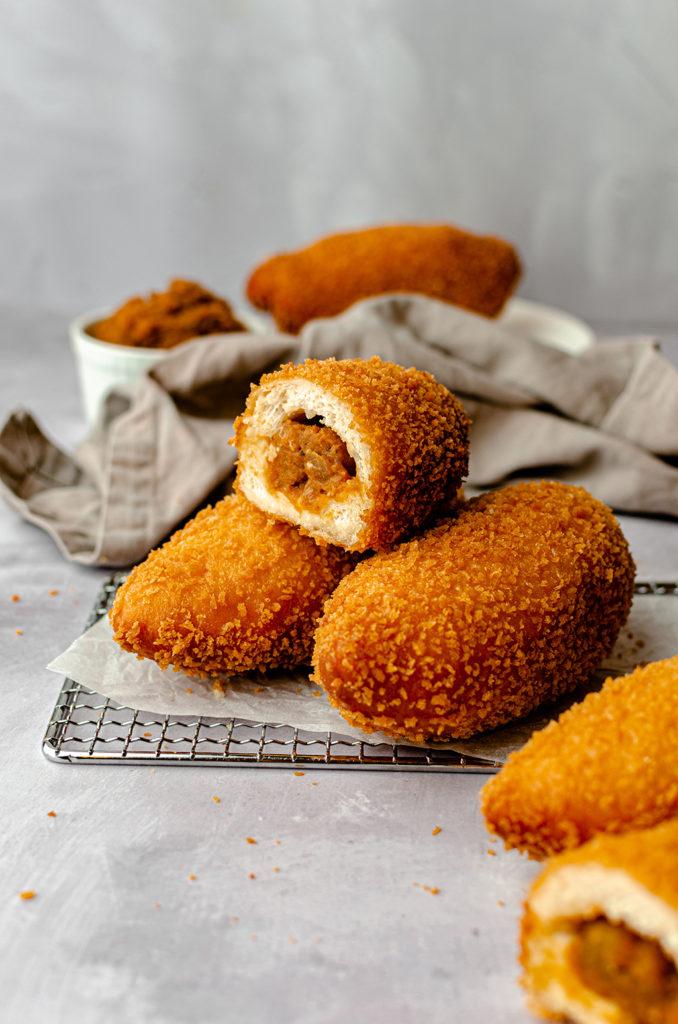
Kare Pan, aka Japanese curry bread, is filled with a delicious savory curry filling, covered by soft fluffy bread, and coated with crispy panko. It’s one of the most common pastries seen in many Japanese bakeries and “conbini” which means convenience stores in Japanese. If you love Japanese curry, then you'll absolutely love this. Which, by the way, I do have a delicious Japanese curry recipe! If you haven’t seen that recipe yet, what are you waiting for? Click here to check it out. Go on, I’ll wait. Trust me, you won’t regret it.
As I’ve mentioned above, these are very popular in Japan. If you’ve ever been to Japan you know that their convenience stores are the best. Not only do they have yummy snacks and drinks, but they also have fresh made meals that you can take home. They also have a “hot” shelf where you can find these curry pans. Meaning, they are always warm when you want a quick bite to eat. Japanese convenience stores are just so great, I don’t think I can express enough just how great they are. You’ll have to take my word on it. Obviously Japan is more than just it’s convenience stores, there is so much more history and culture, but I won’t get into it here.
If you think this is a complicated recipe, it really isn’t. It’s actually fun and quite easy to make. The best part about this recipe is that this is the best way to use up any leftover curry you have, and it's the perfect to-go snack. You can pick one up whenever the craving strikes, morning, noon, after midnight, or even as you’re pacing the kitchen. My husband and my brother finished these up quickly, they absolutely loved it. They literally couldn’t keep their hands off them!
My Top Tips:
- Thicken the curry. If you’re using my Japanese curry recipe, you’ll want to thicken it up. Having a “saucy” curry will make assembly difficult and messy. (Trust me, I learned the hard way). You’ll have to reheat the curry until the sauce is almost paste like. Do this the night before, that way the next day is dedicated to making the curry pan. I would refrain from using cornstarch, too much of it will cause it to be gelatinous and that’s not the texture we’re looking for. Do not overfill! If the curry touches the edges, It will be hard to seal up and it will also open up as you cook it.
- Preheat oil during the second rise. The second rise only takes about 30 minutes, this gives you enough time to heat up the oil to the right temp, which is 320°F. When the dough is done with it's second rise, you can fry them up. If you wait to do it after, you’ll risk the dough over proofing, and the curry pan will come out flat.
- Keep an eye out as you fry. If your oil is too hot the outside of the dough can brown quickly. Use a food thermometer, keep the temp at a stable 320°F. If not, just make sure to have your heat at medium-low and keep a close eye on it. You want to cook the curry pan low and slow.

If you tried this recipe, let me know what you think of it in the comment section! And don’t forget to rate it. You can also share and tag me in your recreations on Instagram @flouredframe. Happy cooking!
📖 Recipe

Vegan Kare Pan (Japanese Curry Bread)
Equipment
- Large pot
- Measuring spoons
- Rolling Pin
- Ruler
- Pastry brush
- Mixing bowls
- Parchment Paper
- Wire cooling rack or plate lined with paper towel to drain excess oil
Ingredients
- 180 grams Japanese Curry
- 320 grams Bread flour
- 200 grams Non-dairy milk (warm (100°F), I used soy)
- ½ teaspoon Kosher salt
- 1 teaspoon Active dry yeast
- 52 grams Granulated sugar
- 28 grams Vegan butter (softened at room temp)
- 80 grams Panko bread crumbs
- Oil for frying
Instructions
Day 1 - Thicken The Curry
- If you followed my Japanese curry recipe, you want to thicken it up a little bit. Place the curry into a large pot and heat it on medium-high. Stirring occasionally until the curry starts to thicken. Depending on how saucy the curry is, this will probably take about 25-30 minutes or more.
- Once you get a thick pasty texture, allow it to cool down to room temp. Cover and place it in the fridge overnight.
Day 2 - Make The Dough
- First, remove the curry from the fridge, allow it to come to room temperature while you work on the dough.
- Next, combine the warm milk and active dry yeast, and allow it to activate. About 10 minutes. While you wait, mix together the bread flour, salt, and sugar in a bowl of a stand mixer.
- Add the activated yeast and softened butter to the dry ingredients, and with a dough hook attachment, mix on low until you get a shaggy dough. Scraping the sides if needed. Then increase the speed to medium and continue to knead the dough for 10 minutes. It should be smooth and elastic, and when you poke it, it bounces back.
- Shape the dough into a taut ball and place it into a large lightly oiled bowl (or just use the same stand mixer bowl). Cover with a damp cloth or plastic and place in a warm spot and allow it to rise for 1-2 hours, or until doubled in size.
- Once your dough has doubled in size, remove the cover and punch down the dough. Divide the dough into 6 equal pieces (use a food scale for more accuracy). Roll each piece of dough into small taut balls, cover with a damp cloth, and place in a warm spot to rest for 15 minutes.
Assembly & Cooking:
- Working with one dough at a time, flatten the dough with a rolling pin to 4 ½ inches in diameter. Flip it over so that the rough side is up and the smooth side is down. With your hands flatten and stretch the edges of the dough about ½ inch more so that you have thinner edges and a thicker center. (View video tutorial below)
- Take about a heaping tablespoon of curry and place it in the center, keeping the edges bare. Take the top and bottom edges of the dough and bring it over and tightly pinch it together, fold the edges over and pinch again (like a hand pie or empanada). and flatten the seam. Make sure that they are properly sealed or they’ll start to open as they rise.
- Brush it all over with soy milk, roll and cover in the panko. Lightly press the bread crumbs into the dough to ensure it sticks and place it on the prepared baking sheet. Repeat for the rest of the dough.
- Let the dough rise in a warm spot for 30 minutes until it has visibly doubled in size. While you wait for the dough, fill a pot with 3-4 inches of oil. Preheat the oil in a large pot or deep fryer at a steady 320° or medium-low heat. When the dough has doubled in size, place 2-3 pieces of curry filled dough, seam side down, into the oil. After a few seconds, flip it over and allow the other side to cook for a few seconds. (You might need to hold it down with tongs because these tend to roll around on their own.) Then continue to fry while continuing to rotate the bread until they are golden brown all around.
- Remove from the oil and allow to drain on a tea towel over a plate or a cooling rack. Allow to fully cool before serving! Enjoy!
Video
Notes
- Measure your flour correctly. I test my recipes, 100% in grams. A common reason baked goods fail is incorrectly measured flour. I always recommend using a scale for accuracy when baking. This greatly improves your chance for success and lessens room for error.
- Keep an eye on these, if they are getting brown too quickly that means your oil is too hot and you will still have raw dough in the middle. If this happens, reduce the heat and try again.
- These will keep in the fridge for a couple days, or you can freeze these for weeks. You can reheat them in the microwave or in the oven
Leave a Reply