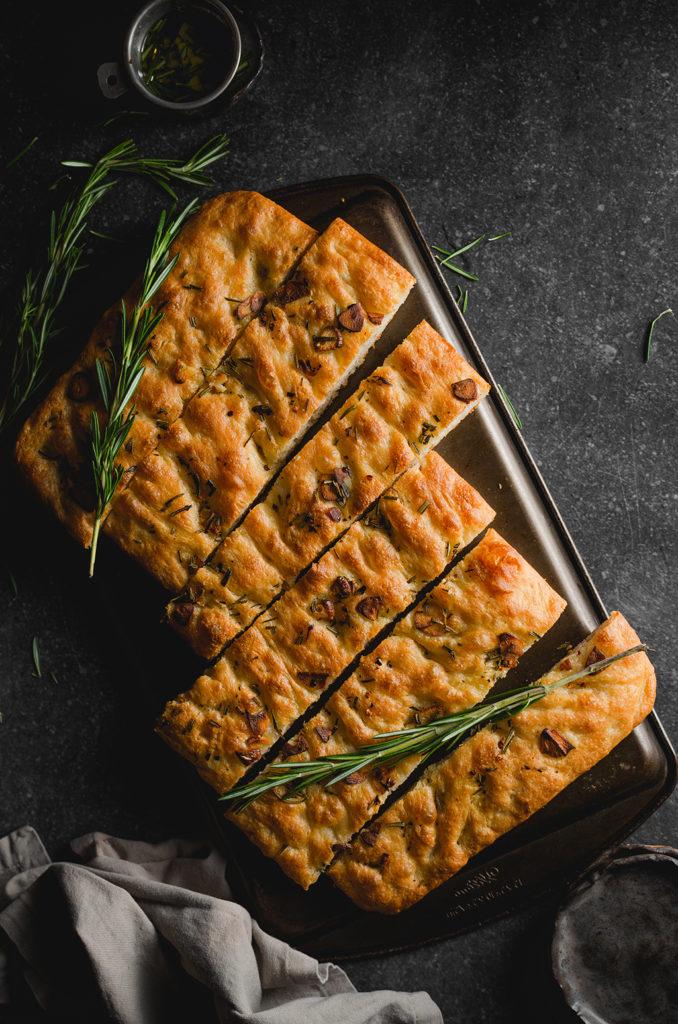
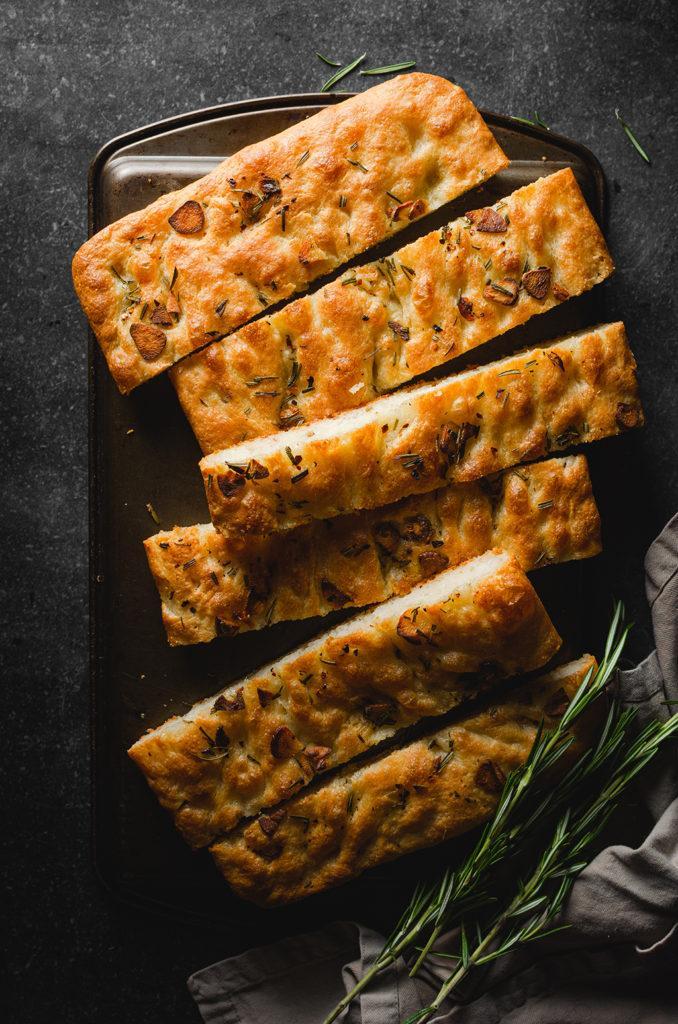
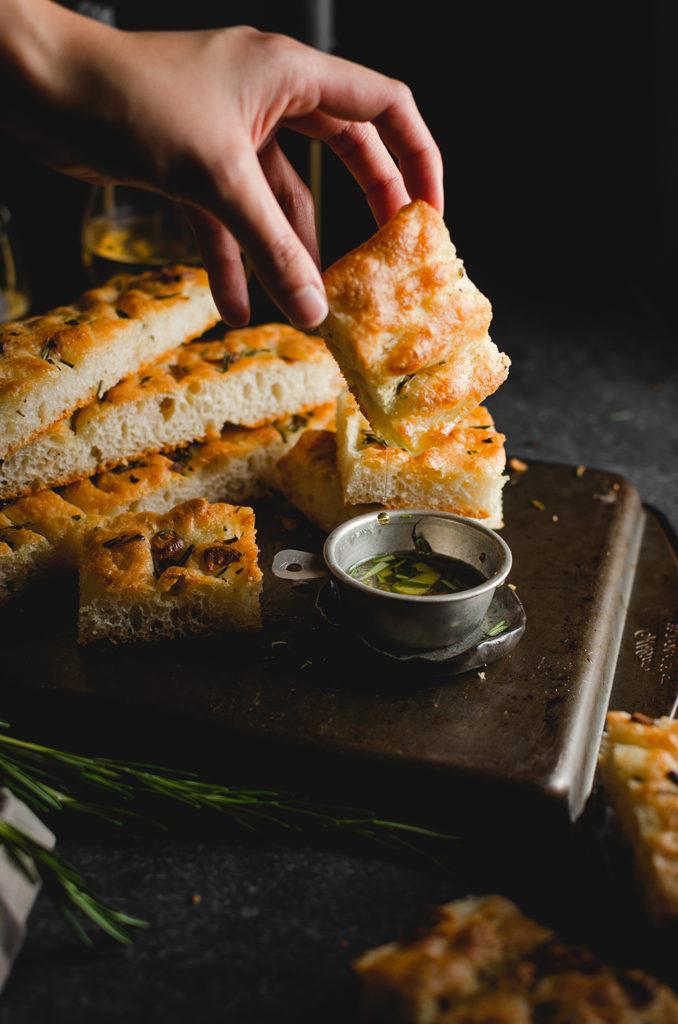
Making delicious and easy focaccia bread at home is actually fairly simple. This recipe is everything you want from an Italian flatbread - it's light, crispy on the outside, and topped with a generous blend of fresh rosemary, garlic, and flakey salt. It's a burst of flavor in every bite!
I'm not gonna lie, I'm not the biggest fan of boring old sandwich bread. But if you give me any sort of artisan bread, I'm all for it. Why? I believe that it just has better flavor, and you can taste the love that went into making it. Focaccia is one of my favorites, it's not only easy to make, but it has SO much flavor. I can personally just eat this on it's own, but you can totally upgrade your sandwich game if you use focaccia as your base.
A couple years ago, I had the opportunity to go to Italy for a work trip. And let me tell you, Italy has a special place in my heart. I love the culture, the food, the people, the architecture, etc. Along the streets, you'll see a variety of bakeries and sitting behind the glass were the beautiful bread. Now, normally focaccia is served as a table bread, as a side or appetizer. And probably to the Italians focaccia is probably just so common that it's not a big deal to them. But to me, a foreigner to their country, I fell in love (along with the other bread they had like ciabatta). So this recipe, highly inspired from that trip. If you want to bring a little bit of Italy into your home, this is a good recipe to start with.
Things to note about making this easy focaccia bread recipe:
- Weighing your ingredients. I've always said this in almost all my baking recipes, but I highly recommend using a food scale for a recipe like this. Food scales is way more accurate than using measuring cups. For a recipe like this, I'm more about precision, and a food scale helps with that.
- Bread flour is an absolute must in this recipe. The amount of protein in bread flour is higher compared to all-purpose, which makes it ideal for gluten development. Because of the high protein percentage it can absorb more liquid, allow it to hold it’s shape better, and rise upward than outward. Since focaccia is a high hydration dough, it’s important to use bread flour.
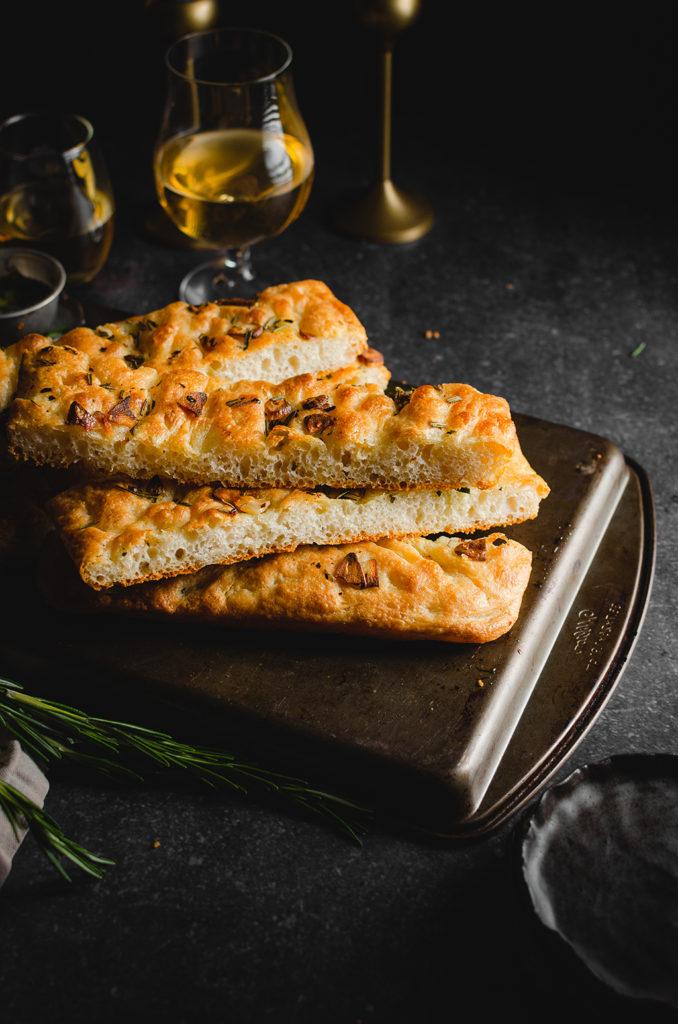
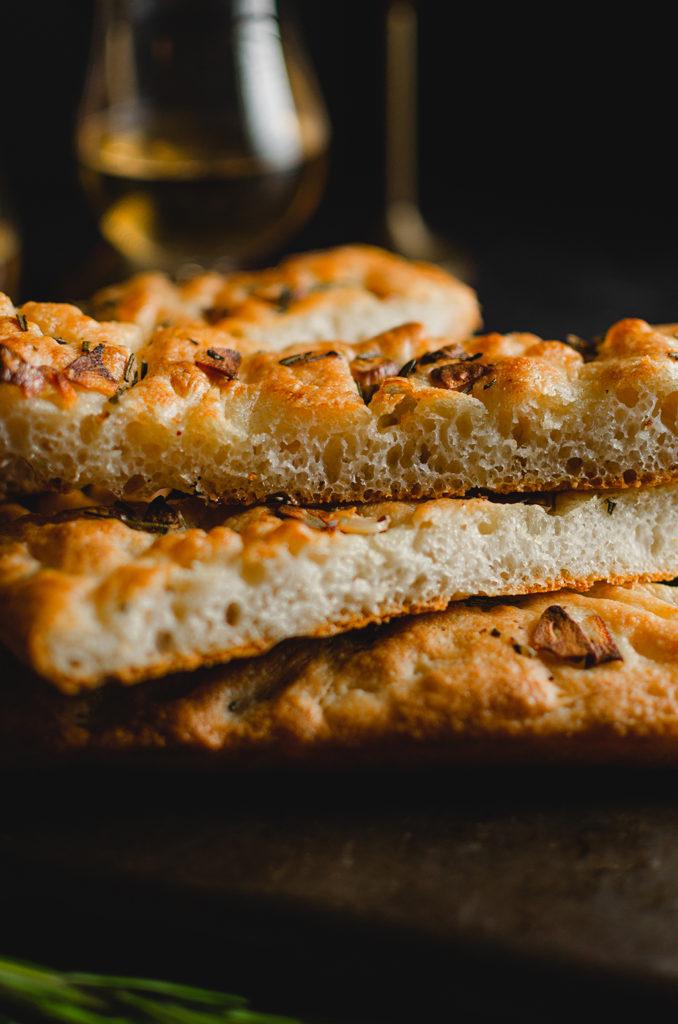
- Focaccia dough is a high hydration dough, this recipe in particular is at 81% hydration. High hydration dough results in a more open the crumb texture, and the thinner and crisper the crust. So don't worry if your dough isn't forming a ball like normal dough, it will be very loose.
- A high hydration dough also means it is very sticky and a very wet dough. Spreading olive oil on your hands will help it from sticking to your hands.
- I have provided two ways to make this focaccia. One for those who do have a stand mixer and a no machine/no knead version. The no knead version will need a bit more love, but it's still fairly easy!
- Something I like to do with a recipe like this is to do a cold fermentation. This simply means that during the proofing stage, I place the dough in the fridge to rise for 12-16 hours. When the dough is fermented at cold temperatures, yeasts produce carbon dioxide and also numerous flavor and aroma molecules.
- For toppings, I love the classic garlic and rosemary. I like to mix the garlic and rosemary in olive oil as I make the dough so that all the flavors can infuse. You can totally use whatever toppings you like!
Optional toppings:
- Cherry tomatoes
- Leeks
- Artichokes
- Asparagus
- Caramelized onions
- Everything Bagel Spice
- Chives
- Flakey salt
- Fresh Herbs
- Garlic
- Olives
- Red Onion
- Sauteed mushrooms
- Sun dried tomatoes
- Za'atar
If you tried this recipe, let me know what you think in the comments below. You can also share it with me on Instagram, just tag @flouredframe. I would love to see your recreations! Happy baking!
If you liked this easy focaccia bread recipe, check these out:
- Gnocchi Al Pomodoro
- Mushroom Garlic Pasta
- Vegan Japanese "Milk" Bread
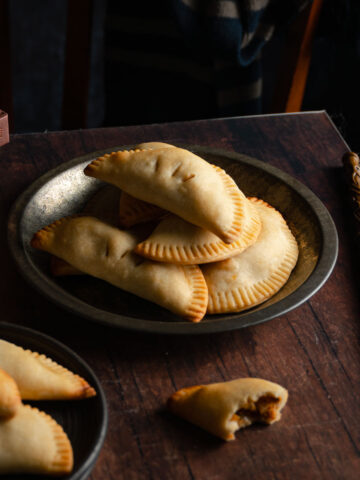
- Pandesal (Filipino Bread Rolls)
📖 Recipe

Easy Focaccia Bread
Equipment
- Food scale highly recommended
- Damp cloth or bowl cover
- Large mixing bowl
- 9x13-inch rimmed pan
Ingredients
- 2 teaspoon active dry yeast
- 360 g warm water (100° Fahrenheit, divided)
- 438 g bread flour (spooned, leveled, and sifted)
- 1 ½ teaspoon kosher salt
- 30 g extra virgin olive oil (plus more for greasing)
Toppings (This is what I used, but you can use whatever you like!)
- 45 g extra virgin olive oil
- 2-3 garlic cloves (thinly sliced)
- 1-2 rosemary sprigs (roughly chopped)
- Flakey salt
Instructions
Dough
- Combine 120g (½ cup) of warm water and active dry yeast in a small bowl. Stir to dissolve the yeast, and set aside for 10 minutes to bloom. See notes
- Meanwhile, combine the bread flour and kosher salt, in a bowl of a stand mixer. When the yeast is ready, add it to the bowl, along with the remaining 240g (1 cup) of warm water, and olive oil. Using the dough hook attachment, mix the ingredients on low until it is well combined. Scrape down the bowl if you need to.
- Turn up the speed to medium and continue to mix for 10-12 more minutes until you get a smooth consistency, and the dough starts pulling away from the bowl. This dough will not turn into a ball because it is a high-hydration dough, and it will be much stickier to work with. See notes
- When the dough is ready, stop the stand mixer, and grease another large bowl with another 2 tablespoons of olive oil. With a silicone bowl scraper or rubber spatula, transfer the dough into the greased bowl. Cover with a damp cloth or plastic wrap, and set it in a warm spot in your kitchen. Allow the dough to proof for 1-2 hours, or until doubled in size. See notes
Toppings
- While you wait for the dough to rise, prep the toppings. I like to infuse the garlic and rosemary in the olive oil to give it a better flavor and aroma. Set aside until ready to use. Also, drizzle olive oil into a 9x13-inch sheet pan until the bottom is covered. You’ll need this to be heavily greased, so that the dough will not stick.
Shaping and proofing
- When the dough has doubled in size, grease your hands with olive oil. Perform a stretch and fold by grabbing a “corner” of the dough in the bowl. Gently lift it straight up to stretch the dough as high as it will go without tearing and fold over to the other side. Rotate the bowl and repeat 3 more stretch and folds. Once completely folded, turn the dough over onto itself and transfer it to the greased sheet pan. See notes
- Next, with oiled hands, work the focaccia dough to the edges by gently stretching it. If the dough is springing back, cover and let it rest for 10-15 minutes to allow the gluten to relax before gently working it to the edges again.
- Grease the inside of plastic wrap and cover the focaccia. This will make it that the plastic will not stick to the dough. Proof the dough for 30-45 minutes.
- Meanwhile, adjust the racks in the oven. Place one on the bottom and one at the top. Then preheat the oven to 450° Fahrenheit. At the end of proofing, the dough should be well risen and puffy with gas bubbles. See notesOptionally, you can do a cold fermentation by allowing the dough to proof in the fridge for 12-16 hours. This will develop more flavors to the dough. Let it sit at room temp for 30 min - 1 hour before moving to the next step. This is the time to preheat the oven to 450° Fahrenheit.
Dimpling and add toppings
- Gently remove the plastic from the dough, you should have no problems with the dough sticking if you greased the plastic properly. Oil your fingertips with more olive oil, and gently dimple the proofed dough by gently pushing to the bottom. Try not to break through the bottom of the dough. Continue to dimple all over the dough.
- Take your toppings and evenly spoon it over the surface of the dough. Get into those crevices too!
Bake and serve!
- First bake the focaccia on the bottom rack for 20 minutes. This will create a nice crispy bottom.
- Next, transfer it to the top rack and bake for another 5 minutes. This will get a nice browned surface.
- After baking, allow the focaccia to cool in the pan for 5 minutes. Then transfer it to a wire cooling rack to completely cool. You can cut it up and serve as is, or cut it in half to make for a delicious sandwich! Enjoy!
Notes
- Weighing your ingredients. I've always said this in almost all my baking recipes, but I highly recommend using a food scale for a recipe like this. Food scales is way more accurate than using measuring cups. For a recipe like this, I'm more about precision, and a food scale helps with that.
- Baking pan. This recipe is fitted for a 9x13-inch pan. However, if you have a slightly smaller pan, this recipe will still work, you’ll just get a thicker bread. If you have a bigger pan, you’ll have to double the recipe.
- How to tell if your yeast has bloomed. It should smell very yeasty, and a bit foamy at the top.
- Make sure your yeast is active. If you’re wondering if your yeast is alive, good news, you can easily test it out. Combine about ¼ of warm water with a ½ teaspoon of sugar, and then mix in about a ½ teaspoon of yeast. (Yeast loves to feed on sugar!) Allow it to sit for 10 minutes, and it should be bubbly, foamy, and smell very “yeasty”. If you don’t see any sort of activity, it’s probably dead. Get yourself some fresh yeast.
- High hydration, sticky dough. Focaccia dough is a very sticky and very hydrated dough. So don’t be alarmed if your dough is not coming together as it should with a regular bread recipe.
- Proofing (or rise) time depends on climate. The proofing time will depend on the climate you are living in. The time in the instructions is an estimate, for me I made this dough during winter, so it took about 1 hour and 30 minutes. For those who live in warmer climates, it might take only an hour. So, I highly recommend paying attention to the size of the dough. If it’s doubled in size, it’s ready.
- Stretch and folds. Click here to watch a video from King Arthur on how to perform a stretch and fold. Stretch and folds are what artisan bread bakers use to improve the quality of their bread. It’s a gentle way to strengthen and develop gluten, and to incorporate air into the dough without kneading. This method is perfect for a focaccia because the dough is at a very high hydration. It would be impossible to knead by hand.
- Why do we need to move the oven racks? I learned this from Claire Saffitz’ focaccia recipe, she first bakes the focaccia on the lower rack to get a nice crispy bottom, then finishes it by transferring it to the top rack to get a nice golden color on the top. I just love how it came out, it was delicious and crispy all over.

Leave a Reply