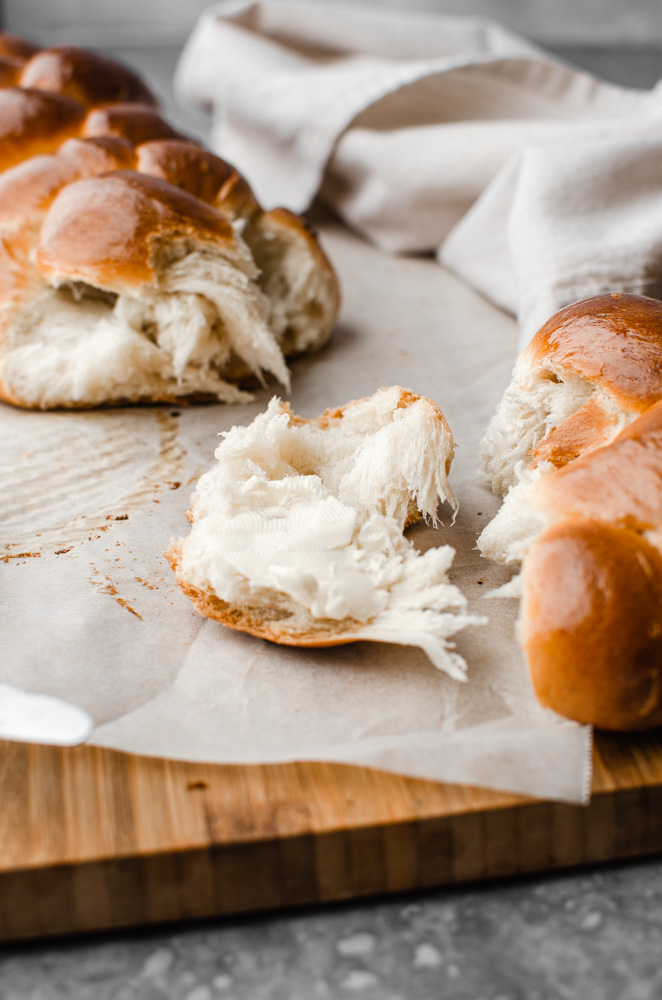
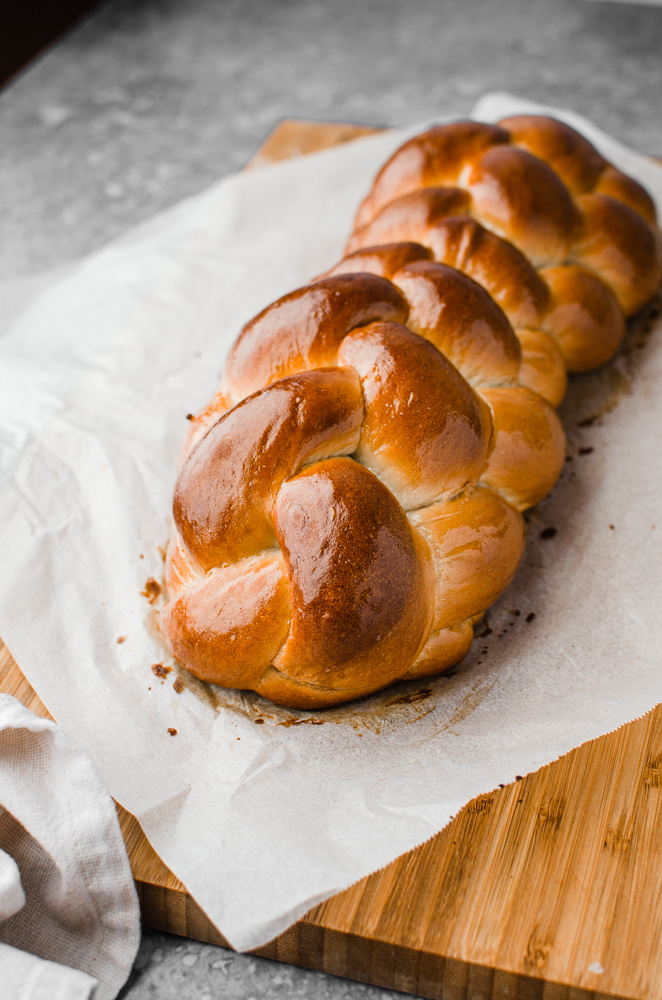
Vegan challah (haa·luh) is probably one of my favorite recipes. It is soft, fluffy, flavorful, easy, and fun to make. It’s so good, my husband and I love to eat it as is and along with a bit of sweet red wine. Sometimes, when we feel like it, we eat it with a little bit of butter and agave. It also makes for good breakfast bread, sandwich, and also french toast. It may look complicated, but it’s really not, and honestly creating the braid is the best part. It’s such a unique-looking bread and tastes great, you’ll definitely want to try this.
What is challah?
Challah is a traditional bread that is served during Jewish ceremonies, such as Shabbat, or holidays like Rosh Hashanah. It is usually enriched with eggs, and it is more commonly seen. However, in Israel, they’ve created their version which is the water challah. Water challah is naturally vegan, and is enriched oil and well, water! So you don’t need any kind of egg replacer for this bread, but it’s not like I use egg replacer in any of my bread recipes! Now, I’m not Jewish and nor am I an expert, but I hope that you find this recipe helpful.
I’ve never heard of challah until I moved to the mainlands, and I stayed with my husband’s family (until we found a place of our own). Every Friday night, my mother-in-law wouldn’t make dinner, but instead made this beautifully braided bread. At the table, we lit candles, said some prayers, tore into the bread, and drank sweet red wine with it. Yes, we are not Jewish, but we are a Christian family and we love what Shabbat symbolizes. This is pretty much how I was inspired to make my own challah. So, what are you waiting for? Try this on your next Shabbat, or just try this recipe in general. Either way, it’s going to be delicious.

Top tips for making vegan challah:
- I highly, highly suggest following the recipe using the gram measurements. It will give you the best results. Cup measurements are not accurate enough for baking and I cannot guarantee the best results if you use them. If you are not using a food scale, make sure to fluff/sift and level out your flour before adding it to the bowl. Flour tends to settle in your container, so you might be adding more flour than you think. For more details, click here to see my top tips for measuring out flour.
- Be patient. Challah isn’t your typical bread, so the rise time will take longer. Depending on where you live, this could take about 45 minutes to 2 hours. Just keep an eye on it, do not continue until it has visibly doubled in size.
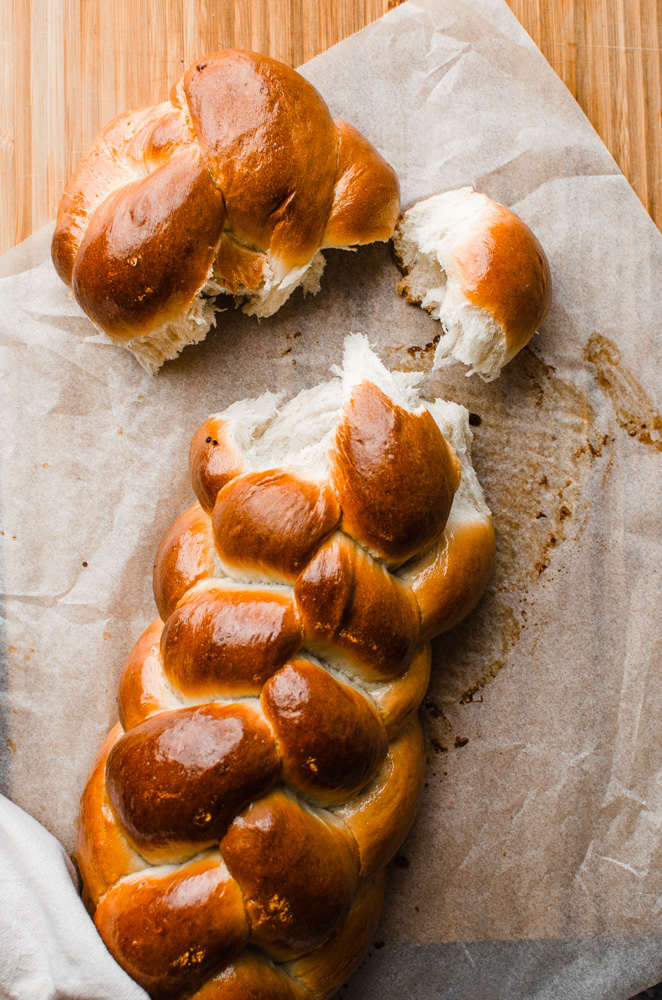
- Tear into this bread! Don’t cut it! It’s way more fun to eat it with your hands.
If you enjoyed this recipe as much as I did, let me know what you think of it in the comment section! And don’t forget to rate it. You can also share and tag me in your recreations on Instagram @flouredframe or on Pinterest @flouredframe. Happy baking!
If you enjoyed this recipe, check these out!
As an Amazon Associate, I earn from qualifying purchases.
📖 Recipe

Vegan Challah (Water Challah)
Equipment
- Measuring spoons
- Small bowl
- Small whisk
- Bench scraper or a large sharp knife
- Pastry brush
Ingredients
Dough:
- 375 grams Bread Flour
- 65 grams Granulated sugar
- 1 ½ teaspoons Salt
- 55 grams Neutral oil (I used vegetable oil)
- 200 grams Warm water
- 1 ½ teaspoons Instant yeast
Glaze:
- 1 tablespoon Maple syrup/agave
- 1 tablespoon Non-dairy milk (I used soy)
Instructions
- Combine all of the dough ingredients into a bowl of a stand mixer, including the instant yeast and oil. Knead with the dough hook attachment on medium-low speed for 10 minutes until it forms one cohesive dough. You’ll know when your dough is fully kneaded when it springs back when you lightly press down on it.
- Shape the dough into a ball and transfer to a lightly oiled bowl and cover. Let the dough rise in a warm spot for 1 hour, or until doubled in size.
- When your dough is done rising, punch it down and divide the dough into the right number of pieces for your braid. (I did a 6-strand braid, so I have 6 pieces of dough.)
- Shape each piece of dough into a smooth ball, cover them with warm damp cloth, and allow to rest for 15 minutes. While you wait, prepare a baking sheet lined with parchment paper.
- After 15 minutes, roll each piece of dough into a rope about 14 inches long, and braid your loaf. Gently place the braided dough onto the prepared baking sheet.
- Cover it with a warm damp cloth and place in warm spot to rise again, about 30-45 minutes or until doubled in size.
- Towards the end of the rise time, preheat the oven to 375°F.
- Then in a small bowl, combine the maple syrup and non-dairy milk. Gently brush the glaze all over the braided dough and bake for 15 minutes. After 15 minutes, carefully remove the loaf from the oven and brush another coat of the glaze. Place it back in the oven to finish baking for another 20 minutes. You should get a lovely dark crust on the outside, dark but not burnt.
- Remove the challah from the oven and allow it to cool on the pan for 15-20 minutes. Then transfer to wire rack to finish cooling. Allow to cool completely before serving. Enjoy!
Notes
- Measure your flour properly. I test my recipes, 100% in grams. A common reason baked goods fail is incorrectly measured flour. I always recommend using a scale for accuracy when baking. This greatly improves your chance for success and lessens room for error.
- The dough should be slightly sticky & supple, it should not stick to your hands. If the dough seems overly sticky and wet, you can add ¼ cup (32g) more flour at a time.
- You do not need to add flour while rolling the dough, but if you find that it is sticking to your work surface, lightly dust with flour over the surface. Do not add too much flour, or else the dough will end up being too tough.
- Challah takes a little bit longer to rise than normal bread. However, humidity, season, temperature and altitude can all impact the rise. It takes my dough to double in size in 1 ½ - 2 hours because I live in a cooler climate. So make sure to keep it in a warm spot and observe it, do not proceed if it has not doubled in size.
- Video Tutorials for a 6 or 3-strand braid:
- 6-Strand Braid: https://www.youtube.com/watch?v=NQvZBwBJ5Uo&t=39s
- 3-Strand Braid: https://www.youtube.com/watch?v=EB4NWC9SNBY
- 6-Strand Braid: https://www.youtube.com/watch?v=NQvZBwBJ5Uo&t=39s


Leave a Reply