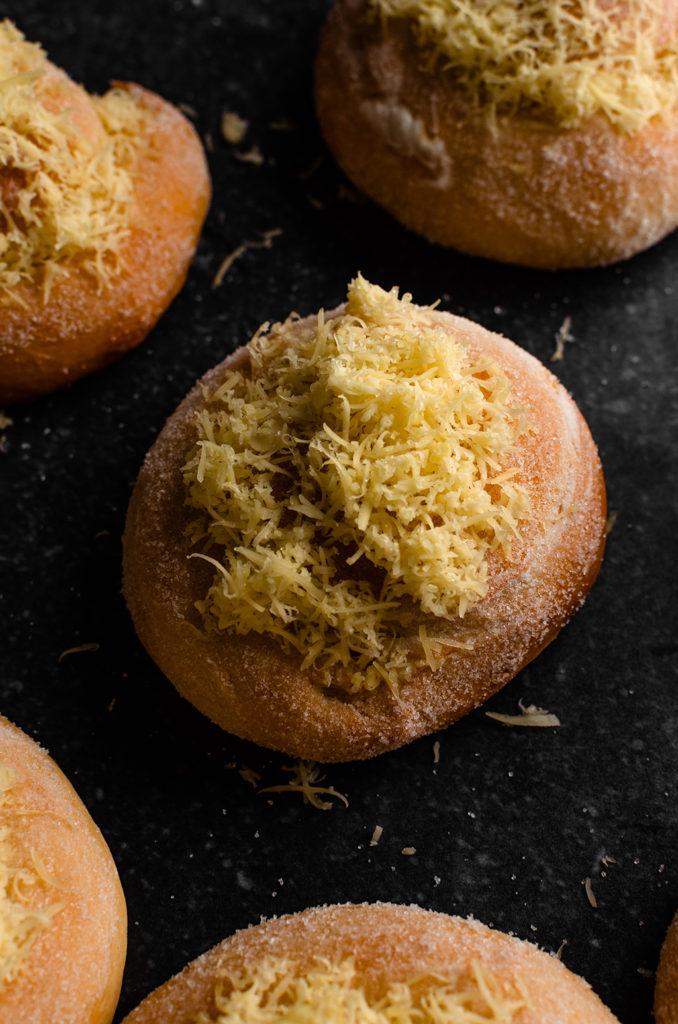
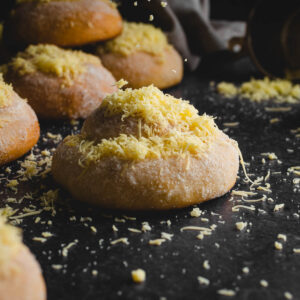
Ok guys, if there’s any Filipino bread recipe that I wanted to share with you, it's this super-soft ensaymada (ehn-sae-mah-dah) recipe. Ensaymada is a brioche bread, topped with a combination of sugar, butter, and grated cheese. I mean, who can resist a buttery sweet bread that’s so tender, light, and fluffy? Perfect for a sweet breakfast or an afternoon snack, and a cup of coffee or tea. Trust me, it’ll be hard to eat just one.

What is Ensaymada?
Ensaymada is a type of Filipino soft and sweet bread covered with butter and sugar and topped with lots of grated cheese. In the 16th century, when the Philippines was colonized by the Spanish, they brought all sorts of changes. Changes that heavily influenced the Filipino cuisine, such as ensaymada

The Filipino ensaymada is an adaptation of the Spanish ensaimada. What’s the difference? Traditional Spanish ensaimada uses pork lard in their dough, called saim. Hence the name ensaimada. While in the Philippines, the base of their dough was butter. Now, in this case, we are not using eggs or dairy to make this ensaymada, but instead I am using my vegan milk bread recipe. It’s the perfect base for this recipe because it’s just as soft, and fluffy as a brioche.

I wanted to make this recipe because, for one, I haven’t seen a completely vegan version of this bread. And two, I was honestly just craving it. Just like the pandesal (Filipino bread rolls), ensaymada are sold at every Filipino bakery. Whenever I would visit my grandma, she would always wake up earlier than us, and fetch us baked goods from the bakeries and serve it to us for breakfast. I remember the joy and excitement I would get when I would open up that brown bag full of baked goods. I will definitely miss those moments.
How To Shape Ensaymada


Working with one piece of dough at a time, roll the dough into a 14-inch rope. Take one end of the dough and start to coil it from the inside out. Leave a space in the middle, as they rise it will fill in the gap.


Tuck the end underneath and gently place it on the parchment-lined baking sheet. Repeat for the rest.

Top tips:
- Using my vegan milk bread recipe. It’s not a brioche, but it’s the best bread that will give you super fluffy results. Don’t worry, I’ll provide it in the recipe below
- No need for molds. Ensaymada is known to have that classic scallop shape at the base. However, I don’t own those types of molds, and I know most of you won’t have those either. So, this will be a free-form bread!
- Don’t add too much flour. This dough is quite sticky, however, I don’t suggest adding too much flour as you shape these. They might get too tough. Instead, add a bit of oil to your hands.
- Use a block of vegan cheese (if you can). Sometimes vegan cheese shreds are a bit too thick and will not stick to the top. I prefer using a vegan cheese block, like the Chao Block from Field Roast, and grating it over the ensaymada. But if you can’t find those you use what you have!
If you like this recipe, check these out:
- Pandesal
- Spanish Bread
- Ube Pandesal
- Siopao Asado
- Leche Flan (Filipino Style Creme Caramel)
- Puto (Filipino Steamed Rice Cakes)
If you’d tried this recipe out let me know in the comments! Don’t forget to follow me on Instagram @flouredframe and don’t forget to tag me when you create my recipes! Happy baking!
As an Amazon Associate I earn from qualifying purchases.
📖 Recipe
Vegan Filipino Ensaymada
Ingredients
Tangzhong Roux:
- 30 grams bread flour
- 120 grams non-dairy milk, I used soy
Main Ingredients:
- 1 ½ teaspoon active dry yeast
- 160 grams warm non-dairy milk, 100°F, I used soy
- 330 grams bread flour, leveled and sifted
- 100 grams granulated sugar
- 1 teaspoon salt
- 42 grams vegan butter, cubed and softened at room temp
Vegan Wash/Glaze
- 1 tablespoon agave or maple syrup
- 1 tablespoon non-dairy milk
For Topping:
- 113 grams vegan butter (softened for easy spreading (might not use all of it))
- 100 grams granulated sugar
- Vegan cheese (I used Chao Cheese Block Creamy Original and grated it. Sub for any mild vegan cheese shreds you like.)
Instructions
Tangzhong Roux:
- Starting out with a cold saucepan, combine the bread flour and non-dairy milk.
- Once the mixture is fully incorporated, place the pan over medium heat. With a heatproof silicone spatula or wooden spoon, stir continuously. Keep stirring until the mixture has completely thickened and has become sticky.
- Remove from heat and set aside to let it come to room temperature.
Dough:
- Soften the butter. Remove butter from the fridge and allow it to soften at room temp for 30-45 minutes. You’ll know when the butter is soft when you are easily able to press down your finger on it.
- In a measuring cup or bowl, combine the active dry yeast, and warm soy milk. Set aside for 10 minutes to allow the yeast to bloom. It should be frothy and bubbly at the top.
- In the bowl of a stand mixer, combine the bread flour, salt, and sugar. When the yeast is ready, add it along with the Tangzhong roux to the dry ingredients. Attach the bowl to the stand mixer, and with the dough hook attachment start mixing the dough at the lowest speed.
- When it starts looking like a shaggy dough, add in the softened butter, 1 tablespoon at a time until fully incorporated. Then increase the speed to 2 and continue to knead for 10 minutes until you get a smooth dough.
- Remove the dough from the bowl, transfer it to a lightly floured surface and shape it into a smooth ball. Gather the ends of the dough to the middle, and pinch them together. Flip it over with the seam side down and use your hands to move it around in a circle. Tucking the dough underneath itself, pull their tops taut.
- Place the shaped dough into a large lightly oiled bowl (or just use the same bowl). Cover with a damp cloth or plastic and set it in a warm spot. Allow it to rise for 1 – 2 hours or until doubled in size.
- Meanwhile, line a baking sheet with parchment paper.
- When the dough has doubled in size, punch it down to release the gas, and transfer it to a work surface. Evenly divide the dough evenly into 8 pieces. If you are using a food scale, make sure they are equal in weight.
- Working with one dough ball at a time, cover the rest with a damp cloth. Roll the piece of dough into a 14-inch rope. Take one end of the dough and start to coil it from the inside out. Leave a space in the middle, as they rise it will fill in the gap.
- Tuck the end underneath and gently place it on the parchment-lined baking sheet. Repeat for the rest. Leave 2 inches in between each piece of dough.
- When you’re done forming and shaping the dough, cover the pan with a damp cloth and place it in a warm spot for 30 minutes to rise. While you wait, preheat the oven to 350°F.
- In a small bowl, prepare the glaze. Combine the agave and non-dairy milk.
- When the dough is ready, gently brush the glaze over the top. Bake for 20-25 minutes or until golden brown.
- Remove from the oven, and allow it to cool on the pan for 5 minutes. Transfer to a wire cooling rack to finish cooling.
Finishing touches:
- When the bread is fully cooled, spread the tops with softened butter and dip into a bowl of sugar. Making sure that the tops are well covered in sugar. Top it off with some grated cheese and serve immediately! Enjoy!
Notes
- Measure your flour correctly. I test my recipes, 100% in grams. A common reason baked goods fail is incorrectly measured flour. I always recommend using a scale for accuracy when baking. This greatly improves your chance for success and lessens room for error.
- If you measure by cups, avoid scooping the measuring cup directly into the flour. This tends to pack the flour into the cup, resulting in too much flour and a very dense or gummy finished product. Instead, aerate your flour (fluff it with a fork or spoon) and then spoon it into your measuring cups, leveling it with your finger or the back of a butter knife. Keep in mind though, that this method is not guaranteed to be accurate.
- This dough is quite sticky, however, I don’t suggest adding too much flour as you shape these. They might get too tough. Instead, add a bit of oil to your hands.



Phoebe says
Incredible recipe, I just found your blog yesterday and made these today, everyone loved them. I cannot wait to make more of your recipes, they all look so so good. Thank you!!! I am so glad I found you!
Floured Frame says
I'm so glad you think so! Thank you for making my recipe!!