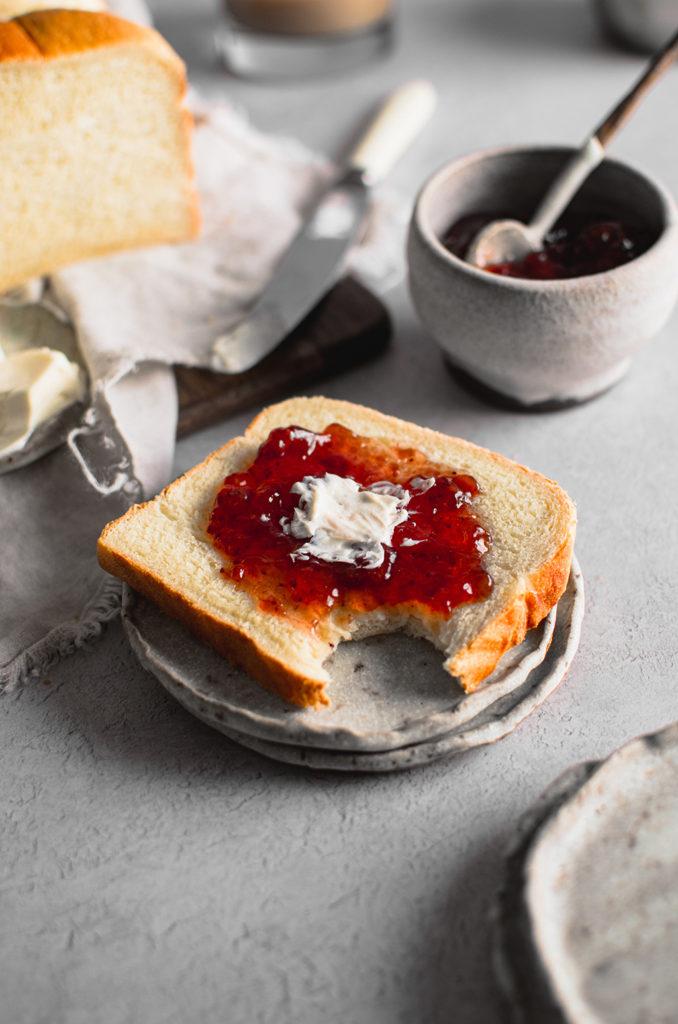
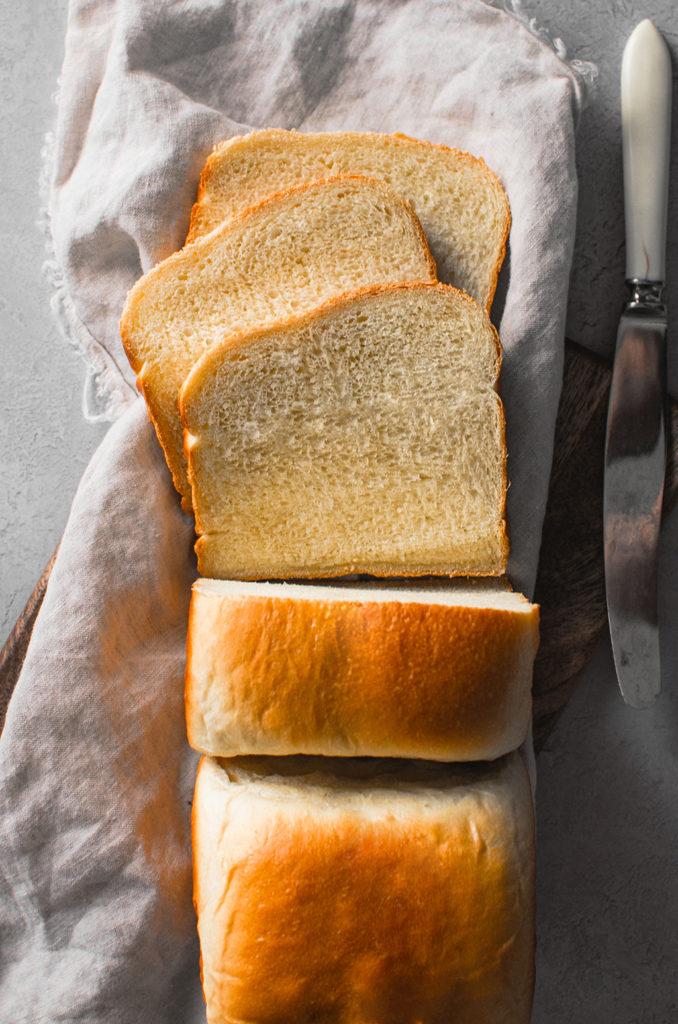
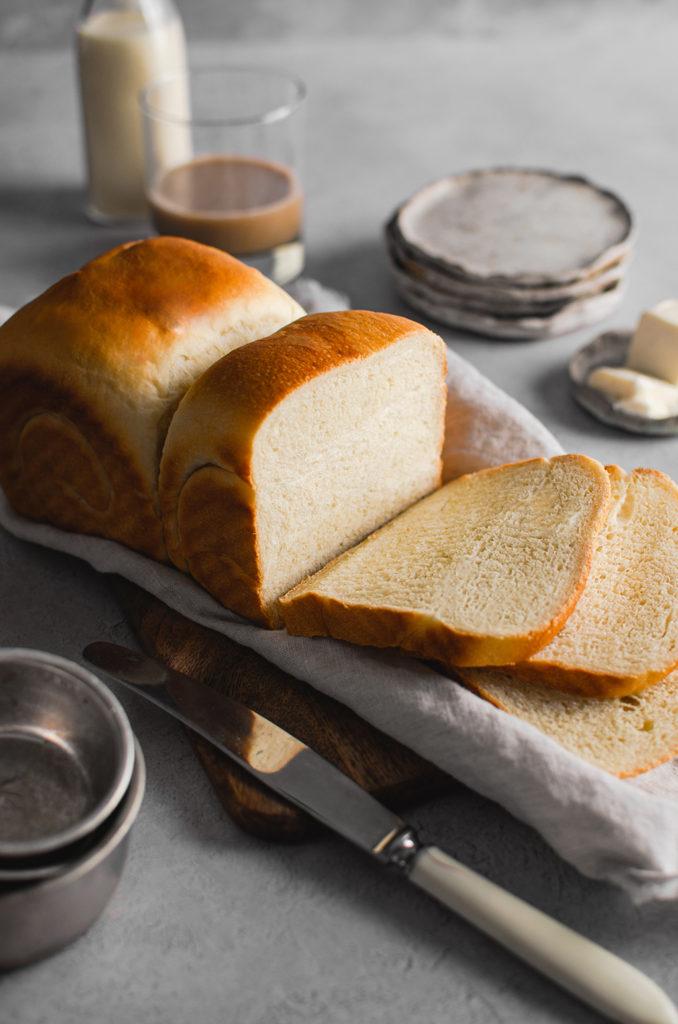
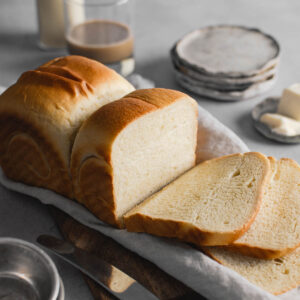
Japanese milk bread, shokupan (食パン), shoku meaning eating and pan meaning bread, is a lightly-sweetened white bread that's incredibly soft, fluffy, and moist. Without a doubt, each slice is rich in flavor, which makes it irresistible. This bread is absolutely perfect for everyday use. Certainly a great base for sandwiches or toast, and even a sweet dessert. This vegan Japanese milk bread will surely make you rethink normal store-bought bread.

If you've ever traveled to Japan, it's hard to deny the amount of detail, quality, and care they put into their products. Food is no exception. For example, if you've ever seen Japanese bakeries or any Asian bakeries as a matter of fact, when they make sandwiches, they just look perfect. However, taking a bite into it is another story, it's just so fluffy and soft. I know what you're thinking, "It looks like a boring old white loaf to me...", well, it's not! This could be the most perfect bread ever created. So, what's the secret? Well, keep on reading!
What's the secret to making vegan Japanese milk bread?
Specifically, the difference between store-bought white bread and this vegan Japanese milk bread is the addition of tangzhong (湯種). However, there is a second method, called the Yudane method. The Yudane method originated in Japan and was shared throughout the Asian Countries. Taiwanese cookbook author Yvonne Chen introduced the Tangzhong method. Both serve the purpose to gelatinze the starches with hot liquid. Although, the main differences is that the Yudane you add hot liquid to the mixture. Whereas, the Tangzhong method requires you to cook it. Nonetheless, the extra addition to the bread makes this bread stay moist for longer. It also results in, a fluffier, softer, and more delicious end product. But, for this recipe, we will be using the Tangzhong method!
Top tips to make vegan Japanese milk bread:
- Use a food scale - If you've been following me, all my baking recipes use grams. Weighing your ingredients is more accurate and gives you consistent results every time.
- Use bread flour - The high percentage of protein in bread flour is ideal because it will produce more gluten and achieve the desired rise in this bread. All-purpose will not turn out the same, unfortunately.
- Make sure your yeast is active - It's always a good idea to check your yeast before you start. Luckily, it's simple to do this. Combine ¼ cup of warm water, 100° F to be exact (anything hotter will kill your yeast), ½ teaspoon of sugar, and ½ teaspoon of active dry yeast. After 10 minutes, it should be bubbly, foamy, and smell very "yeasty". If there is no activity, it's probably dead.
- Soymilk - Compared to other non-dairy milk, soy milk has a high protein content that is similar to regular milk. Which makes helps the overall end product. If you want to use different non-dairy milk, just keep in mind the results may vary.
- Make them into dinner rolls! If you don't want a loaf of bread, you can easily turn this into dinner rolls. They'll be just as delicious!
So, if you tried this recipe, let me know what you think in the comments below! You can also share it with me on Instagram, just tag @flouredframe. I would love to see your recreations! Happy baking!
If you liked this recipe, check these out:
Photos updated on February 2021.
As an Amazon Associate I earn from qualifying purchases.
📖 Recipe
Vegan Japanese Milkbread (Shokupan 食パン)
Equipment
- Small saucepan
- Heat-proof silicone spatula
- Small mixing bowl
- Rolling Pin
Ingredients
Tangzhong Roux:
- 30 grams Bread flour
- 120 grams Soy milk, unflavored (I used Silk Original)
Main Ingredients:
- 42 grams Vegan butter (cubed and softened room temperature)
- 2 ¼ teaspoons Instant yeast
- 160 grams Soy milk (lukewarm 100° F, I used Silk Original)
- 330 grams Bread flour
- 50 grams Granulated sugar
- 1 teaspoon Salt
Vegan Wash/Glaze
- 1 tablespoon Agave or maple syrup
- 2 teaspoons Soy milk
Instructions
Making the tangzhong:
- Starting out with a cold saucepan, mix together the ingredients for the tangzhong. Once the tangzhong ingredients is fully incorporated, place the pan over medium heat. With a heatproof rubber spatula or wooden spoon, stir continuously. Keep stirring until the mixture has completely thickened and has become sticky. Remove from heat and set aside to let it come to room temperature.
Making the dough:
- Activate the yeast in the warm soymilk, about 5-10 minutes. As you wait, whisk together bread flour, sugar, and salt in the bowl of a stand mixer.
- When the tangzhong has cooled to room temperature and yeast is activated, add them to the bowl with the dry ingredients.
- With a dough hook attachment, and on low speed and mix the ingredients for 5 minutes. Once you have a cohesive dough, add in the butter one cube at a time. Work it in the dough until the butter has been completely kneaded in.
- On the stand mixer, switch to medium-low speed, and continue to knead the dough until you get a smooth and bouncy surface. For about 12-15 minutes. See notes
- In a large, lightly oiled bowl, place the dough inside and cover it with a damp cloth and set it aside in a warm spot. Let it rise for 1 hour or until doubled in size.
- Punch down the dough and transfer it to a work surface. Shape the dough into a ball by tucking them underneath itself, pulling their tops taut. Making them nice, smooth, and round. On the work surface, use your hands to move it around in a circle. This will tuck the dough into itself, and essentially sealing the bottom.
- Cut the dough into two equal sizes. If you are using a food scale, make sure they are equal in weight. If not, try to eyeball as best as you can. Form the dough into balls, cover with a damp cloth and let them rest for another 15 minutes.
- Take one dough ball and flatten it to a 6-inch x 10-inch oval (15 cm x 25 cm). Flip it over so that the smooth side is facing up. Fold in the long edge and take the bottom end and roll it up. Pinch the end onto itself so it does not unravel. Place it in the bread pan seam side down. Repeat for the second dough ball. Cover with a damp cloth and let it rise again for one more hour.
- As you wait, prep your vegan wash, mix together, and set aside.
- When the bread dough hits the last 20 minutes of its rise, preheat the oven to 350° Fahrenheit. When your dough is doubled in size and has filled up the bread tin, lightly brush the top with the vegan wash and pop it in the oven. Bake for 20-25 minutes or until the top of the bread is golden brown. After, let the bread cool in the pan for 10-15 minutes.
- Remove it from the tin and let it completely cool on a wire rack. Cut it up and enjoy!
Notes
- Why do I need a food scale?I test my recipes, 100% in grams. A common reason baked goods fail is incorrectly measured flour. I always recommend using a scale for accuracy when baking. This greatly improves your chance for success and lessens room for error.
- If you’re measuring by cups, avoid scooping the measuring cup directly into the flour. This tends to pack the flour into the cup, resulting in too much flour and a very dense or gummy finished product. Instead, aerate your flour (fluff it with a fork or spoon) and then spoon it into your measuring cups, leveling it with your finger or the back of a butter knife. Keep in mind though, that this method is not guaranteed to be accurate.
- If you’re measuring by cups, avoid scooping the measuring cup directly into the flour. This tends to pack the flour into the cup, resulting in too much flour and a very dense or gummy finished product. Instead, aerate your flour (fluff it with a fork or spoon) and then spoon it into your measuring cups, leveling it with your finger or the back of a butter knife. Keep in mind though, that this method is not guaranteed to be accurate.
- Why soymilk? Compared to other non-dairy milk, soy milk has a high protein content that is similar to regular milk. Which makes helps the overall end product. You can use different non-dairy milk, just keep in mind the results may vary.
- Do I need to have a stand mixer? Of course not, you can make this by hand. It will just take a little bit more effort.
- You’ll know when your dough is kneaded enough when it springs back immediately when lightly pressed, and doesn’t tear when you pull it apart.
- A Pullman loaf pan is different than your regular bread pan. It was designed for this type of bread. I did try it out it a regular bread pan, and the results differed. You don’t get the same height as the Pullman loaf pan.
- This recipe is also perfect for dinner rolls! You can shape them evenly into 9-equal sized buns, and use a square pan to bake them in.


Juliette says
Awesome recipe! Tried it last night for the first time and it looked just like the video. I’m wondering what I would do, though, if I wanted to create a larger loaf that could press up against the lid of the Pullman to create a square shape. Should I proof for longer? Add more dough?
Floured Frame says
I'm so glad you that this recipe turned out so well for you! As for the square shape, yes, make more dough!
I typically add half more of the recipe. Then proof and bake with the lid on! I've tried this and it turns out really well.
Anna says
I thought the idea behind the Pullman loaf pan is to cover the top. In the video it didn’t seem that you placed the cover on top before baking. How is your pan different from a regular loaf pan since you didn’t cover the top to bake? Is your pan deeper than a regular loaf pan?
Floured Frame says
Hi! In the video, I did cover the top, I just didn't show it. The pan that I used in that video was deeper and bigger, which is why my loaf didn't rise up all the way to the top to form that pullman loaf look.
I have since then bought a different pan, which is the one that I linked in my recipe card. Hope that clears things up.
Sarah says
Tried this and it was amazing! What size pan do you use? I baked with a 9x4 Pullman and added half more to the 1x recipe, but the dough overflowed while baking. Still produced a beautiful rectangle bread but want to minimize the overflow.
Floured Frame says
I'm so glad you loved this recipe!! So I use the same size pan, I use the one from USA pans, the one with the lid. The last time I tried to make a perfect rectangle loaf, I think I only added a 1/4 more to the 1x recipe. So try that next time!